If you wish to produce a DVD with several clips of movies and wish it to start with a menu so that the user can select which clip to view this is how to do it.
Some of the photos showing what to do are too large for the blog so if you want to see more just click on the photo and you will get to its source for a better view.
In Pinnacle, load your clips using the folder icon and, select the location you have stored your clips. Select the first one you want and open it to Pinnacle. It will appear in boxes on the left hand side. Select all clips (either drag across all boxes or select EDIT, then Select all.) Drag to timeline. (or you can even drag each box individually).

Now add all other clips.

Return your cursor to the beginning of the first clip.
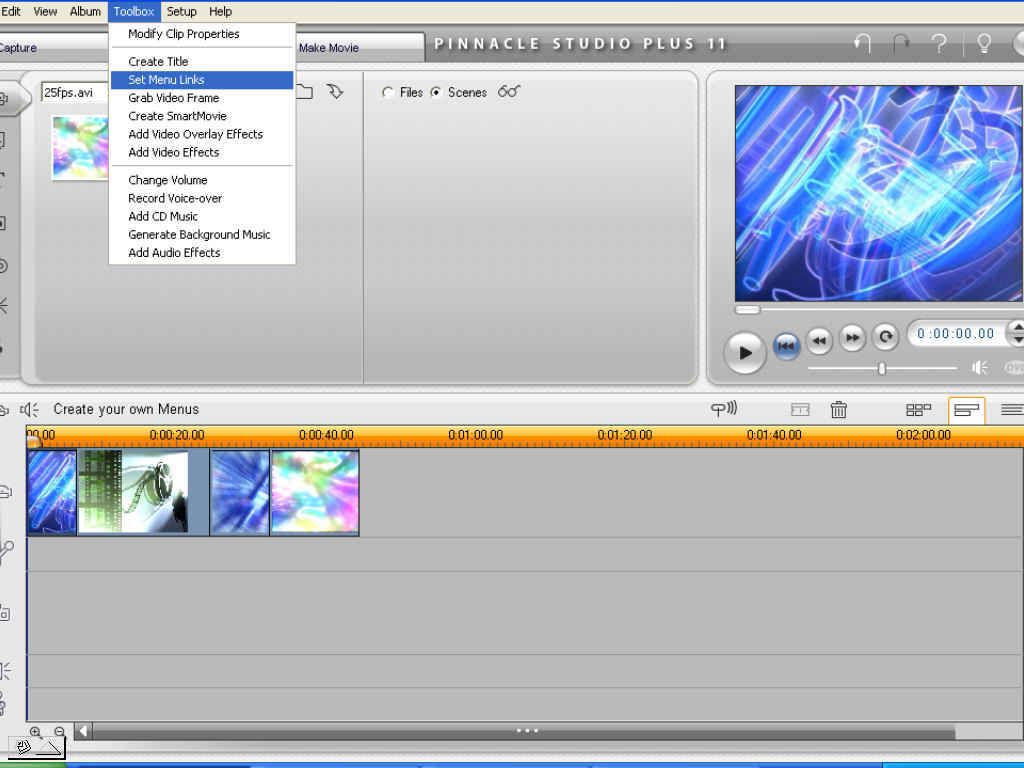
Now select Toolbox from the top tab and then select Set Menu Links
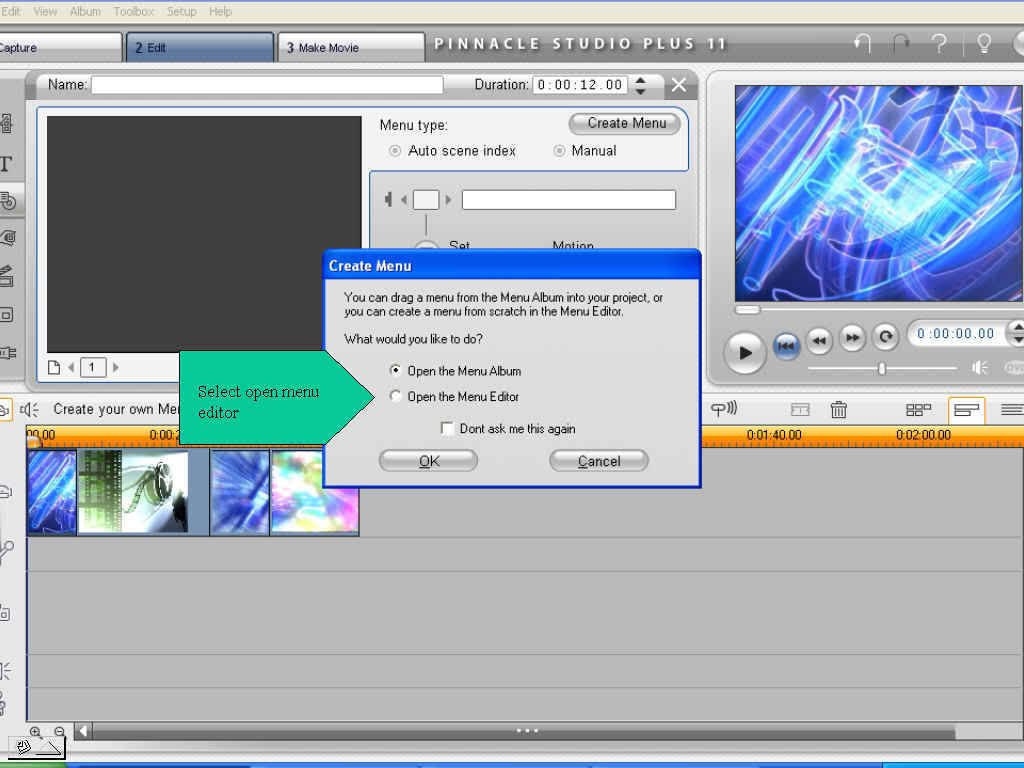
Click on Create Menu this will open a pop-up box asking if you want to open Pinnacles own templates (album) or the editor. In this case we want to make our own so check the box Open menu editor then click OK.
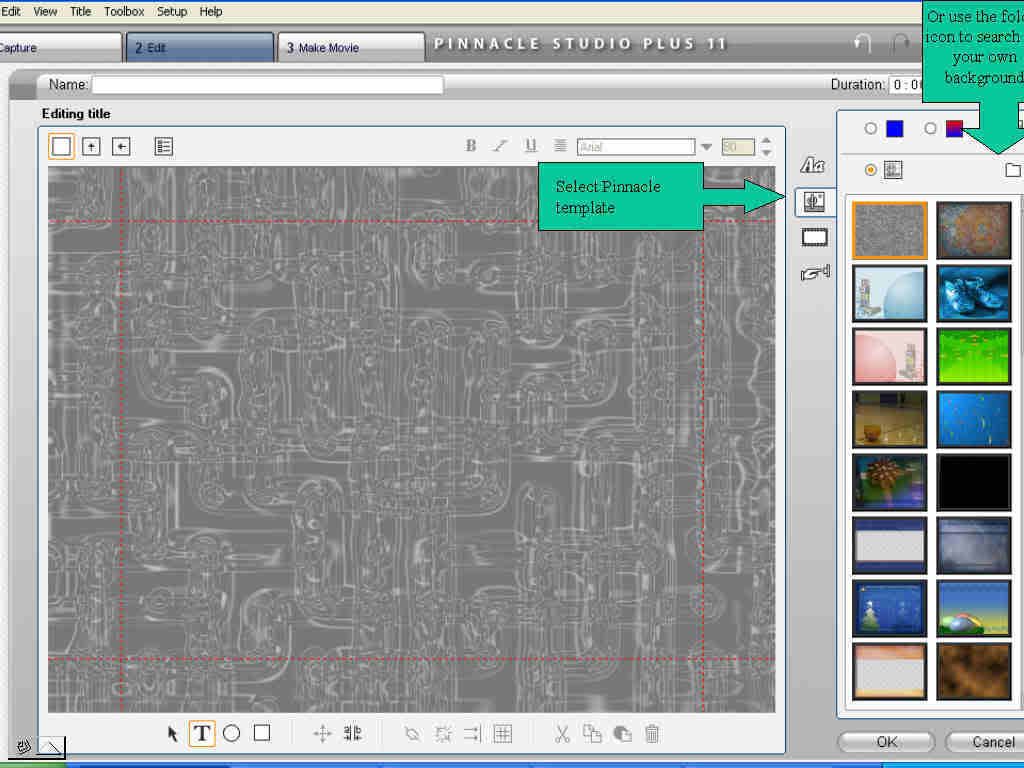
You now have the familiar titling interface.
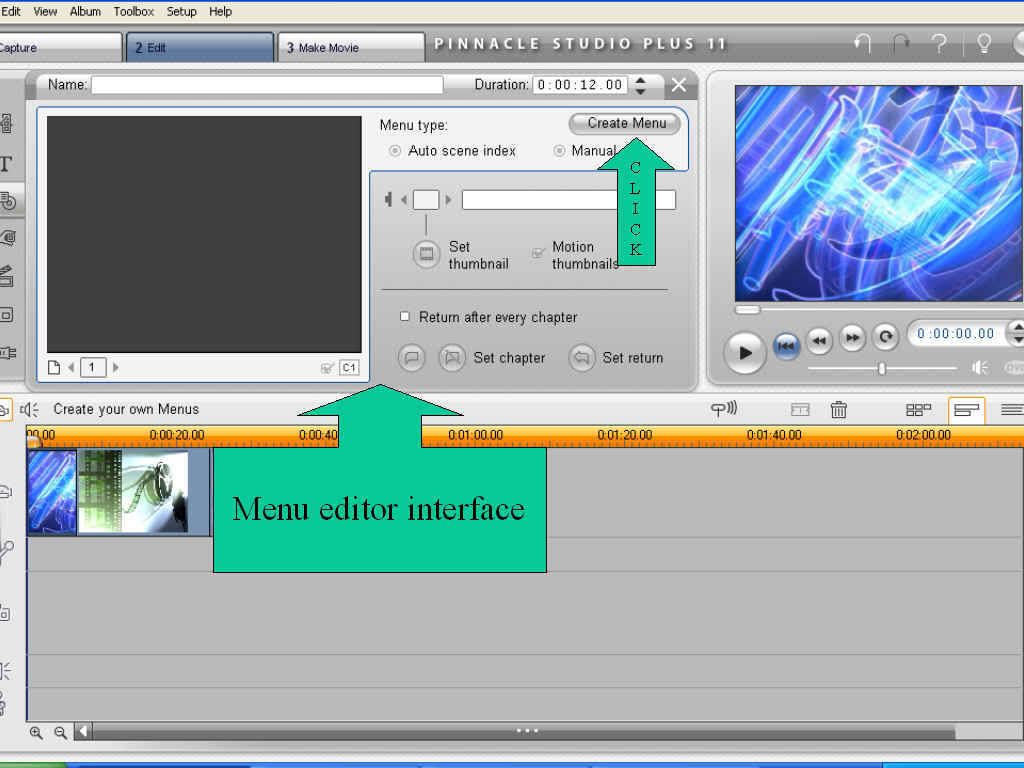
You now have the familiar titling interface.
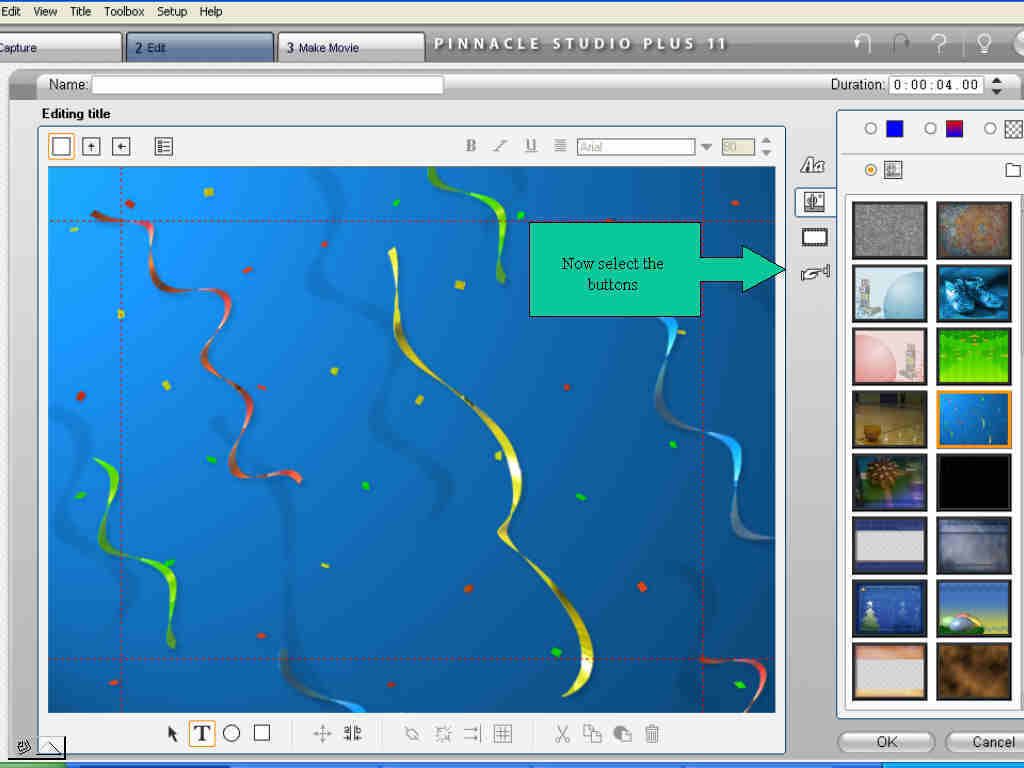
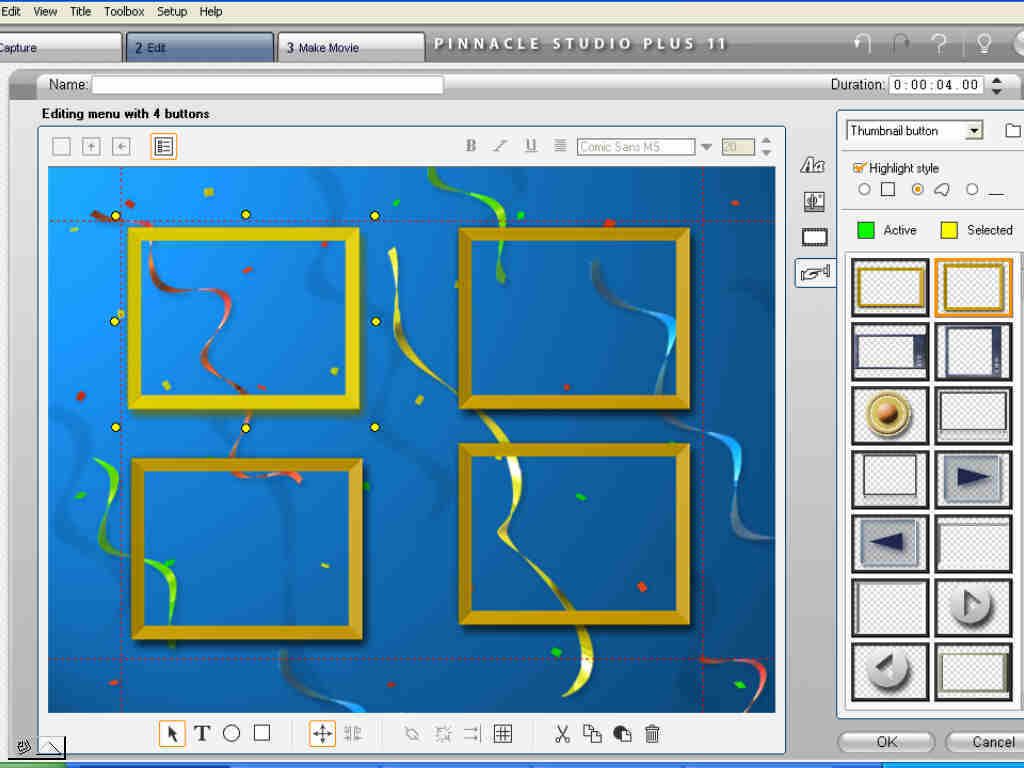
Firstly we want to select a background. At this point you can select a Pinnacle background or, click on the folder icon (creates new pop-up box then you can then scroll to where you have a suitable picture stored, click on it and it will fill the title space.
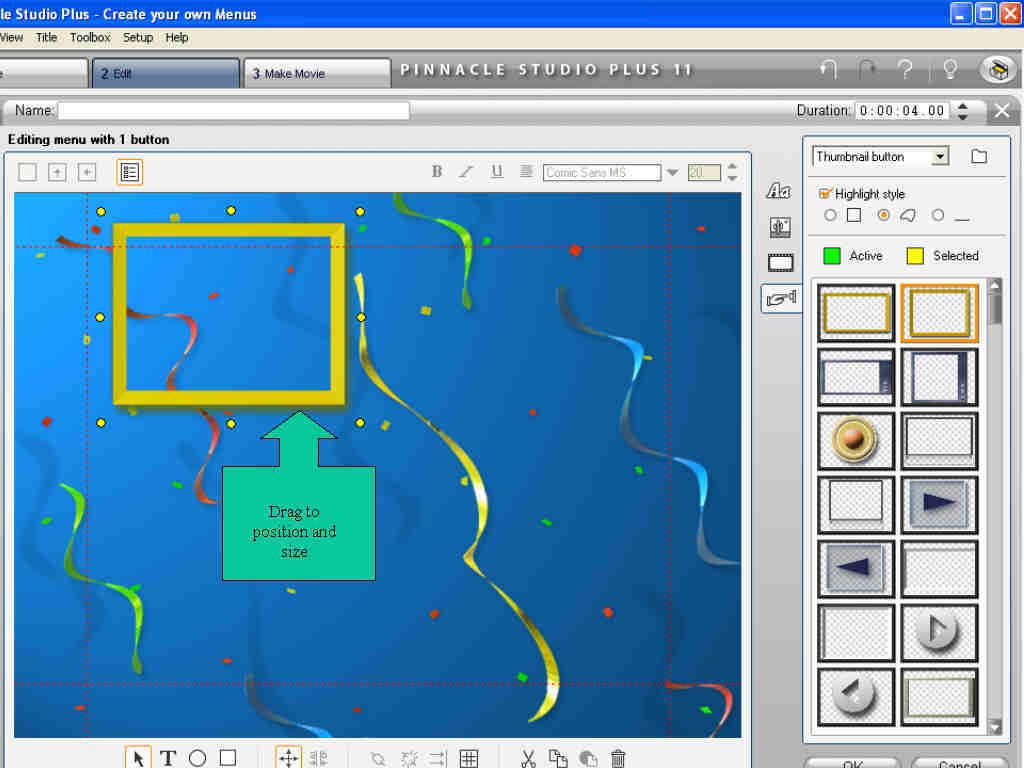
Next, click on the finger icon to select which Buttons you want and select by double clicking it from the new gallery. Now you can resize it by clicking on it and dragging the corner handles to the size you want.
(TIP: when you have the right size click EDIT, COPY PASTE and a duplicate will appear, drag this to where you want it positioned, repeat PASTE for more if you want them).
Once you have all your Buttons placed on the background, click OK which returns you to the timeline.
The Menu Editing box is still open and now you want to create the individual clips in the buttons you have just made.
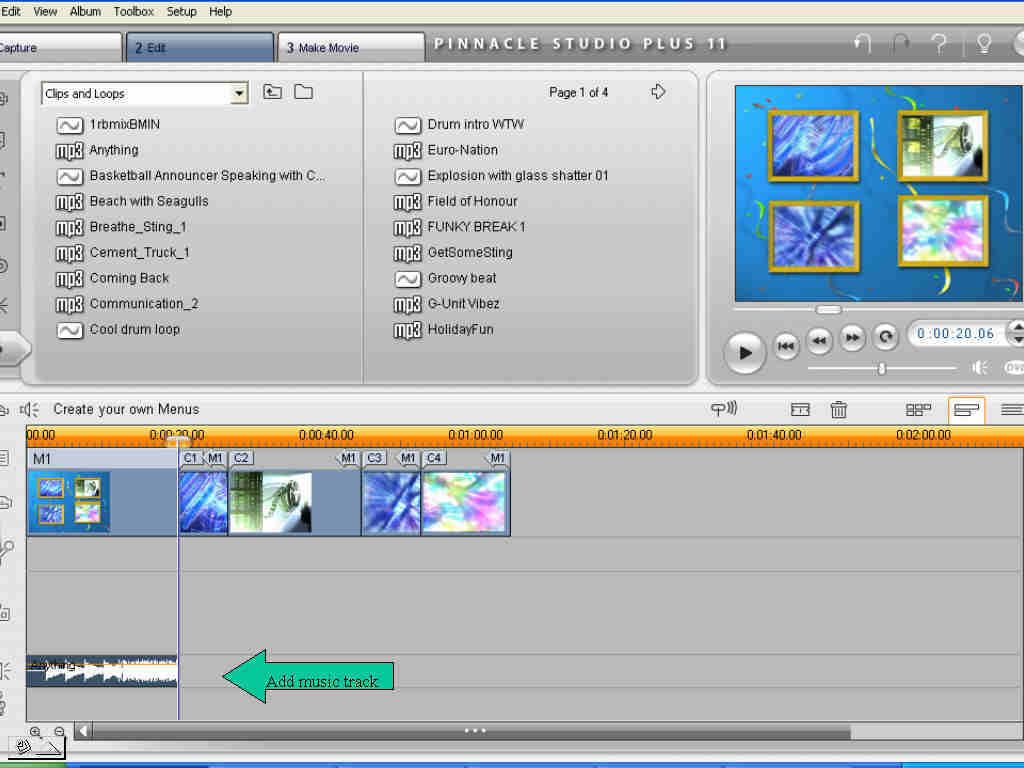
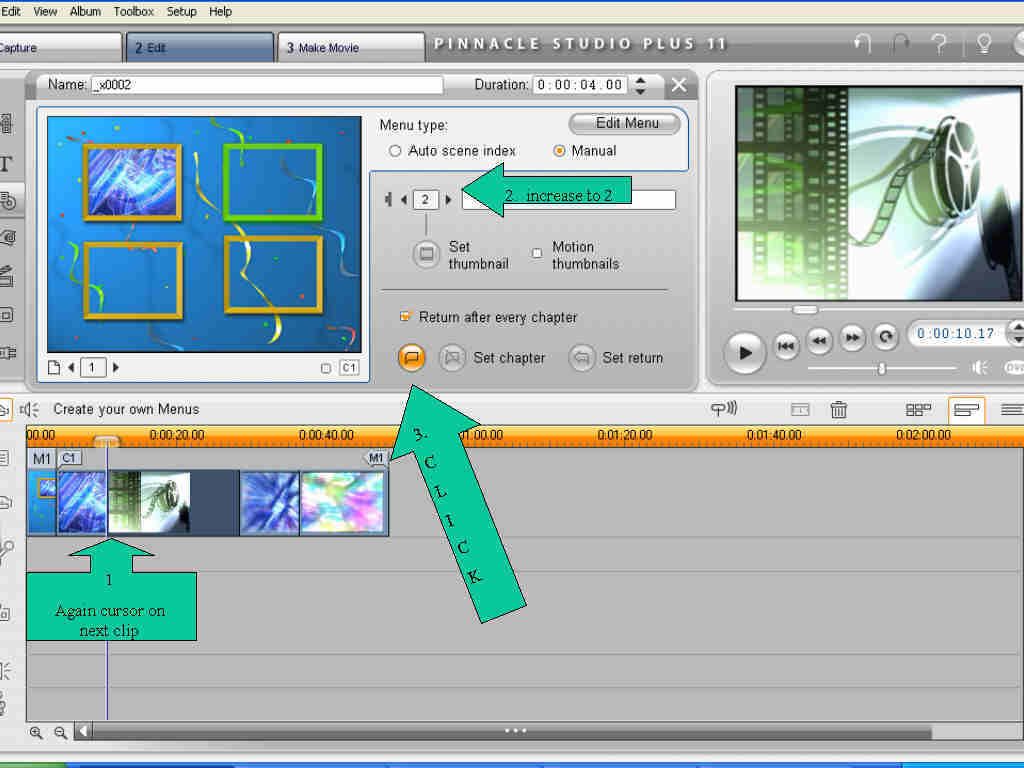
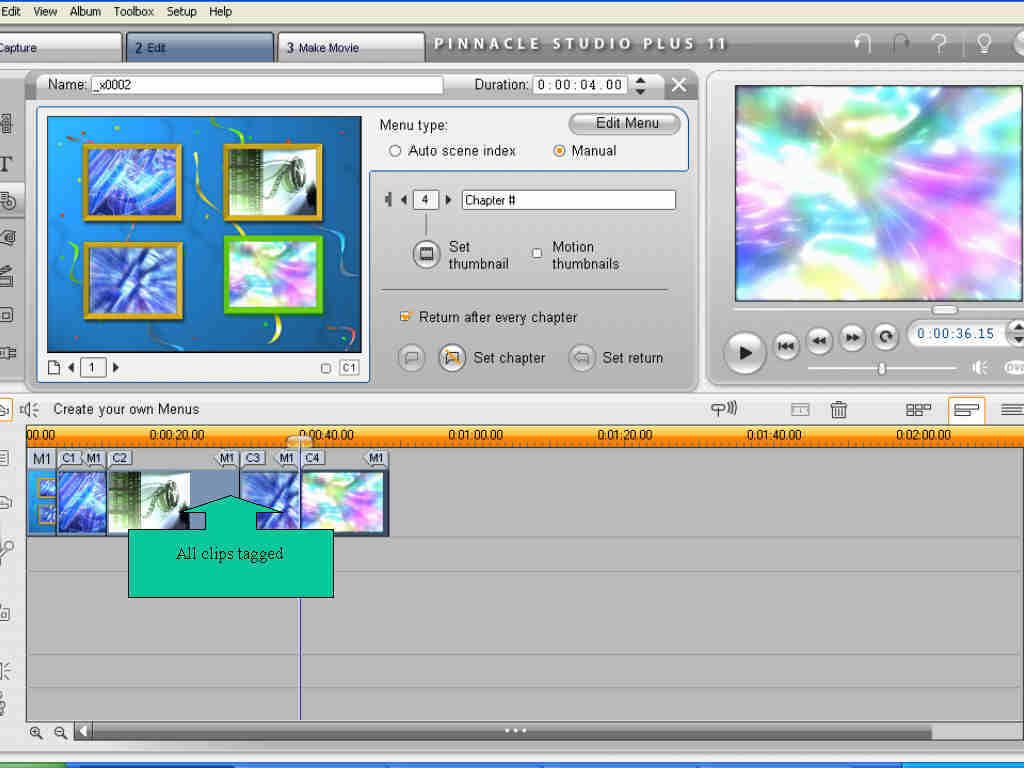
Place your cursor on the first button and click once, (it will turn the borders green) Now, place a tick in the box marked RETURN AFTER EVERY CHAPTER. You will notice that M1 appears over the title frame. Move your cursor to the beginning of the first clip on the timeline and select the first round button on the menu editor (place the pointer on it and it will say “place a chapter link” click on it. You will notice C1 has appeared at the start of the clip and the clip is inside the button in the preview window. Now put your cursor on the start of the second clip and change the chapter number to 2 (C2 has now appeared at the start of this clip. Repeat this process till all your clips have been tagged. (Always remember to change the chapter number incrementally).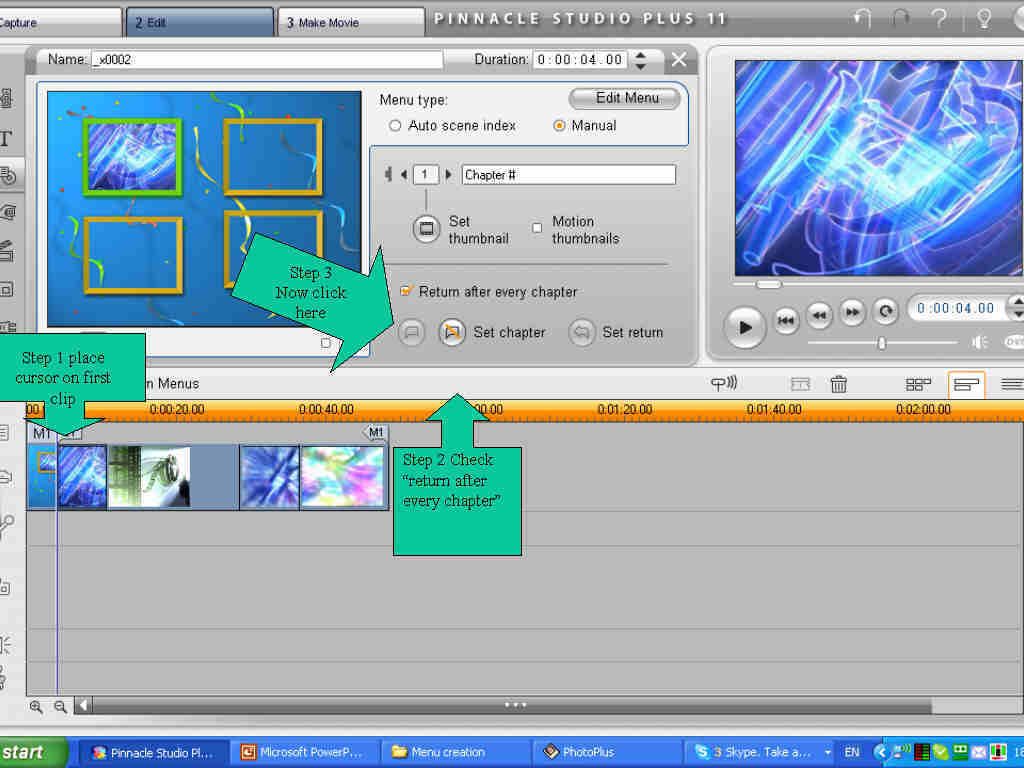
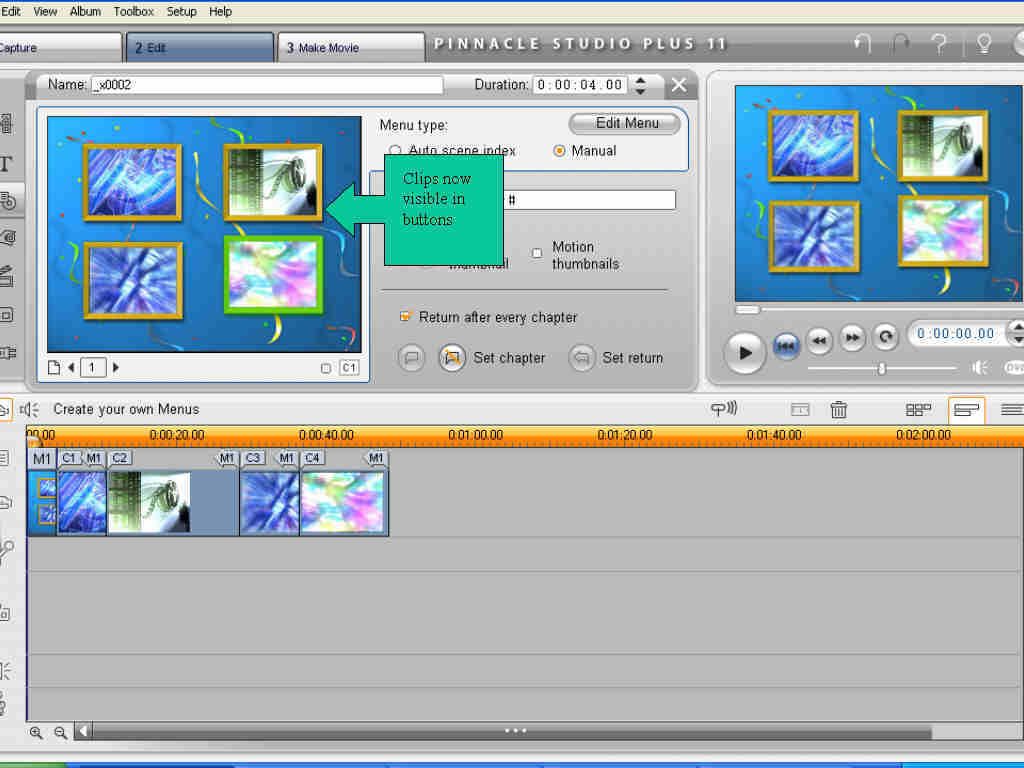
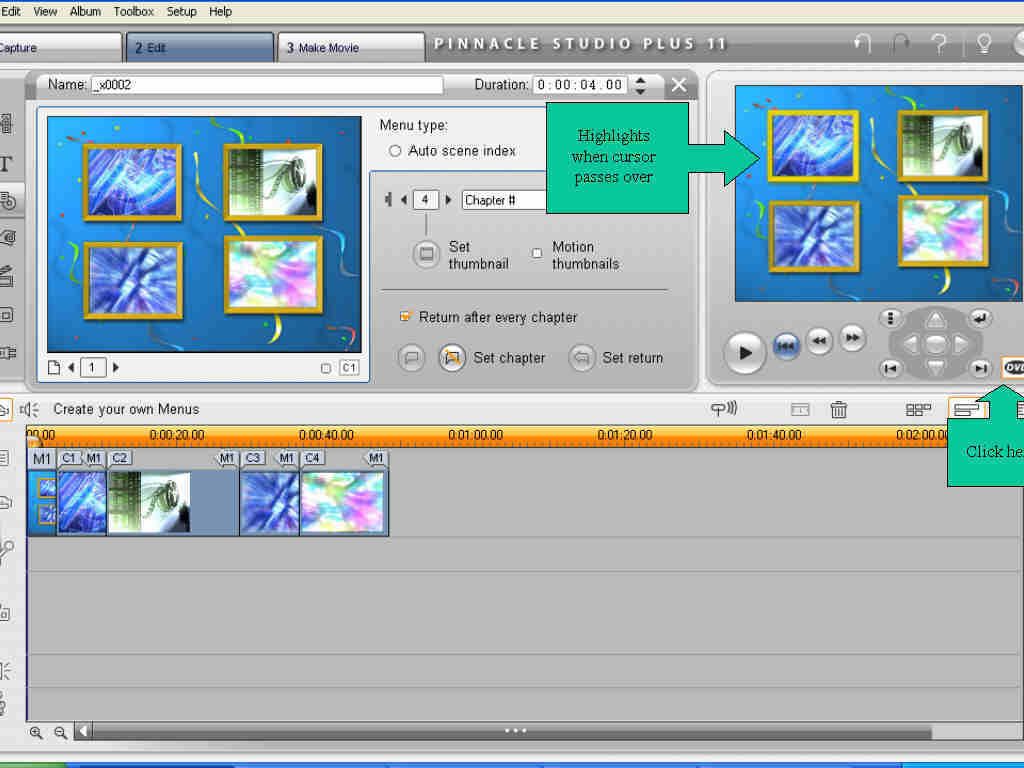
If you want your clips to play whilst on display in the button boxes, click in the box marked Motion Thumbnails
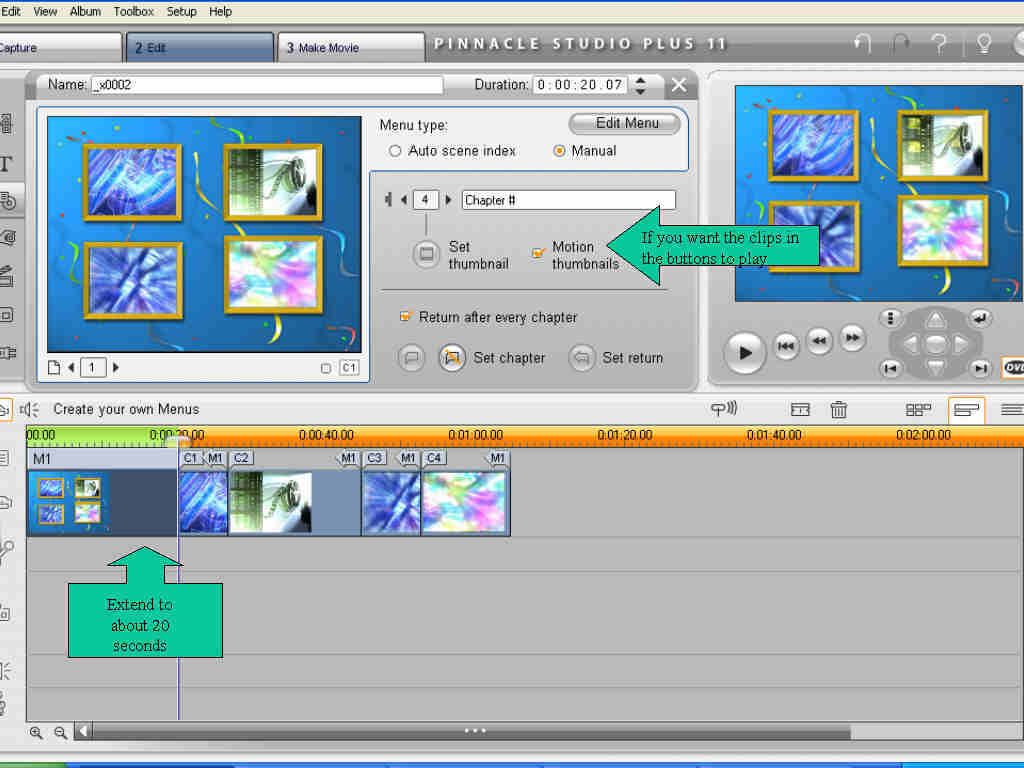
Now click OK and return to timeline
Finally, you need to increase the display time of the title you have created so drag the end of the title clip to 15 or 20 seconds.
If you want to add music to the title clip you can do so using any stored music or CD you have, go to Album tab and select Music and either scroll to where your music is stored or to the drive of your music CD.
To check all is in order, click on DVD on the preview monitor and then enlarge to full screen, test each button by placing the pointer on it and you will see it highlight, click to play.
Now you should go to "Make Movie" and burn directly to disc (choose whether DVD,SVCD etc)
Congratulations, You are now able to make your own designer menus for DVDs
